How to Restring Your Taylor Guitar
Restringing
Rob Magargal at the Taylor Guitars repair facility shares how they restring guitars after cleaning the body.
Level of Difficulty:
Easy
Quote:
"Give it a shot. I know you can do it."
Materials Needed:
Set of Elixir Strings
Wire Cutters
String Winder
Digital/Chromatic Tuner
Phillips Head Screwdriver
1.4" Nut Driver
-
Read the Video Transcript
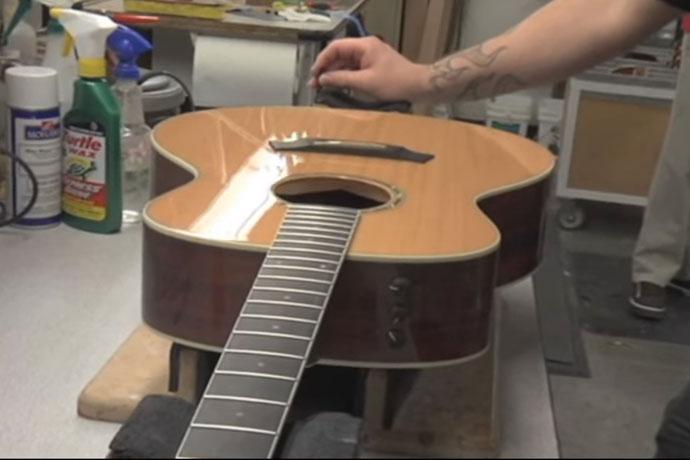
We've cleaned the guitar. We've polished it. We've cleaned our fingerboard and oiled it. We've tightened the tuners down, we've checked the buttons. Now what we're going to do is restring it. I've got a great set of Elixir NANOWEBs here; these are medium gauge set. We really like these here at the factory. I'm going to put these on the guitar.
We install the strings into the bridge all at one time. So come a little closer, and we can show you how we do that. You can see the holes in the bridge, all six, and we've got the string pin.
- Take the string and slide it into the hole.
- Push the pin into the hole over the string.
- Pull the string to lock the pin in.
- Do that to all six
The reason we do it like this is twofold: 1) to keep the pins from flying off while we are stringing the guitar and 2) to keep these ball ends from rattling. A lot of times while playing guitars the ball ends will rattle, and people want to know, "Where is this sound coming from in my recording?" while playing soft passages. Making sure they are seated up against the pin plate, you will be set and won't have that issue.
All six strings are in now, and I want to reach in now with a light touch to make sure they are all touching the pin plate. I feel safe about this.
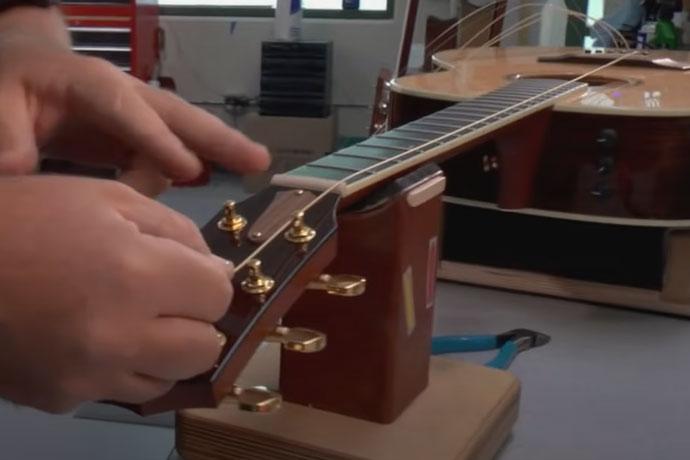
Another thing we do here at Taylor with all of the strings: If you are going to put the low E on, you want to cut it at the A post. This will allow you the right amount of string.
- Always keep tension on the string.
- Cut the Low E string to length [at the A post].
- Place the string into the post.
- Then start turning the post while keeping tension.
- All winds go underneath each other.
- Once the string is on, you should see about 2 ½ winds. That's the right amount of winds for a low E string.
Repeat the process for the A string.
- Always keep tension on the string.
- Cut the A string to length [at the D post].
- Place the string into the post.
- Then start turning the post, while keeping tension to keep string end from slipping out.
- All winds go underneath each other. This creates downward pressure on the nut and keeps your guitar in tune. If you have winds over winds, your guitar will continue to play out of tune. You will think you have a problem when it was the just poor installation of your strings.
Repeat the process for the D string.
- Always keep tension on the string.
- Cut the D string to length; imagine you have another post to cut at.
- Place the string into the post.
- Then start turning the post while keeping tension to keep string end from slipping out.
- Same thing: Manipulate the string; all winds go underneath.
Got the G [string].
- Now the G has the thinnest core, so I'm going to go a little bit longer [in length]. The reason I do that is it allows the string to get past the bell curve of the hole and that is where the string breaks, especially on the G because it does have the thinnest core. So you want to make sure that is nice and clear. When we are done putting the string on, you'll see what I mean.
- So now the very last wind of the string is past that little curve here … that little cut angle [on the nut]. That is going to allow you to detune it and tune it several times before you put any fatigue in the string.
Come up to my B string.
- Cut it at the G post.
- Same thing [as before].
[High E string installed in the same way with no comments in the video.]
Now with all of our strings on properly, the downward pressure at the nut is correct, and we're going to get really good sustain out of the guitar. That's a big part of an acoustic instrument.
Now we are ready to tune up the guitar. You can get your digital tuner, your chromatic tuner... I use a tuning fork. Now I am going to set it on the bridge; you hear the ring tone. Because we locked our strings in, notice that our bridge pins are still seated. Nothing is popping up; everything is sitting right where it is supposed to be.
I didn't try to put it perfectly in tune now, because what we have to do is stretch our ELIXIR Strings. You definitely need to stretch every string. How I do that is this: I'm going to lift up here, right at the sound hole. This allows me to get my hand in here. I'm going to work this way [toward the posts], just a light little stretch. What that allows is the string gets a little bit of stretch all the way up and now it's going to stay in tune. We call that "stage ready."
[tuning again] You can see how flat those strings went.
Now our strings are on, we're in tune, but what we want to do is really make sure our neck relief is correct. There is a very simple way to do it: we are going to use the guitar string. The guitar string is always straight and something that has to be constant. That's what we always say here.
So what we are going to do is this; come on up here and I will show you what we got. We are going to go with the 1st fret here [puts finger on 1st fret]. I'm going to come up here also to the 14th fret [puts other finger on the 14th fret]. Now I'm going to tap right in the middle of the fingerboard here [taps with thumb], and there's just a little bit of tap. That is the right amount of relief for a Taylor guitar. If you have any more than that, you'll want to loosen the truss rod -- and that would be by turning it to the left or tightening it by turning it to the right -- and I'll show you that here real quick. I'm going to take out these nuts here, and there is your truss rod nut on a Taylor guitar. It's a quarter inch nut driver, and it's very simple to adjust them.
What you want to do is this: put it on turning it to the right. If we turn it to the right, it's going to tighten the neck and draw it backwards slightly. If we loosen it by going to the left, it's going to draw if forward. Now, this one is correct, but what I'm going to show you is how we can make it perfectly straight. I'm going to draw this just a little bit to the right. Now we're going to do that test again: 1st fret, 14th fret, little bit more. There's a little bit of tap, and that's what I want, but I want a little less… perfect. You hear that tick? I don't know if you can [hear] that, but it's a little tick right there. That's telling me it's perfectly straight.
If I didn't get that sound, it's telling me I'm back bowed. Because remember the string is straight, it's telling us what is straight. You don't need to use your eye; the string's going to tell you. But on a Taylor guitar I want to back this off just a little bit [from] where we had it, because this is getting ready to go out. Once again, ah, right there. That's just where I like it, just that little bit. I'm happy with that.
Put our truss rod cover back on, and this one is ready to go. Slide it in here. Do one quick wipe down of any fingerprints. This guitar is ready to go and ready to go on stage. Now I hope, when you change your strings next time, you give this a shot. Elixir Strings here are absolutely fantastic; stay in tune, play well. Give it a shot, I know you can do it. It's easy.